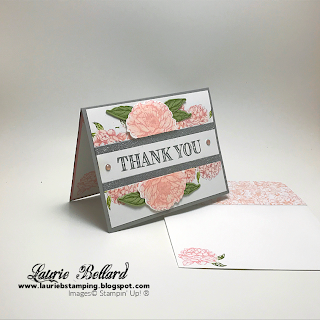
Well I have finally made it to card #3 from my initial YouTube Premier video. I did the video a little over a month ago now (good grief where does the time go!). But I have learned so much about blogging and many other cool tools that are all part of this adventure, and I am ready to get inspired to create the next project to post. I think I will be able to get a better rhythm going. So, stay tuned to see what is next!
But for today, as promised, here is the last remaining card from the Peony class. This card uses the Peony builder dies which are four separate dies that you then piece together to make the gorgeous flower that is the central focus of my card.
After I folded and burnished my Blushing Bride card stock base, I cut out the 4 parts of the peony flower using the Peony Dies with another piece of Blushing Bride card stock. At the same time I cut out 3 leaf bases in Pear Pizzazz card stock and 3 leaf accent pieces from Mossy Meadow card stock. I aligned and adhered the leaf accents to the leaf bases using Tombow Glue. I sponged the leaves with Mossy Meadow ink and a Stampin' Sponge. I also sponged around all the peony petals with Merry Merlot ink. I took a Bone Folder and curled each leaf and petal slightly to bend them to look more realistic. I then layered the peony pieces together using Mini Glue dots. I glued the leaves to the back of the flower with Mini Glue dots.
I ran the Merry Merlot card stock piece through the Stampin' Cut & Emboss machine using the Dainty Diamonds 3D Embossing Folder. I lined up the Merry Merlot piece just below the first circle on the DSP (about 1/2" or so from the top) and adhered it with Stampin' Seal. I centered the Gray Granite Shimmer Ribbon from this suite in the center of the Merry Merlot panel and adhered it to the back of the DSP with Stampin' Seal, then adhered that to the card front. Next I centered a Square Vellum doily, aligning the tips with the ribbon. I put some Tombow glue on an acrylic block and added a couple of drops from a water painter to dilute it some and dabbed glue in the center and on each corner of the back of the doily with a Sponge Dauber and glued it down. Then I centered the peony over the doily and secured it with Stampin' dimensionals. I stamped the Love & Thanks sentiment on a scrap of Blushing Bride and cut it out with the die from the Stitched So Sweetly Die set. I made it smaller than the original die by cutting it where I wanted it on the top, then I lined it up at the bottom aligning the scallops and ran it through the Cut & Emboss again. This gives you many more uses for your dies as it infinitely expands their uses. And as I have said before, I am a more is better kind of girl, so infinitely more is a "Yes, Please!" kinda thing! Once it was cut as I wanted it, I sponged around it with Merry Merlot ink and adhered it to the card front with Stampin' Dimensionals. I added a few of the Petal Pink Elegant Faceted Gems that are part of the Peony suite using the Take Your Pick tool. The final touch for the card front was to go around all of the Peony flower petals with a Wink of Stella glitter pen. It adds such a shimmer and WOW factor!
Card Measurements & Cuts (US measurements):
Blushing Bride Cardstock–5 ½”x8 ½”; scored @ 4 ¼” card base; 3 ¼” x 8 ½”–Peony die; 1 ½” x 2 ½”-sentiment
Pear Pizzazz – 1” x 8 ½” – leaves
Mossy Meadow – 1” x 8 ½” leaf accents
Merry Merlot – 1 @ 4” x 3” card front background mat; 1” x 2” – flower centers
Gray Granite – 1 @ 5 3/8” x 4 1/8” – card inside background mat
Whisper White – 1 @ 5 ¼” x 4” – card inside
Peony Garden DSP – 1 @ 5 ¼” x 4” – card front background; 1 @ 2 ¼” x 6” – envelope flap
Square Vellum Doily
¼” Gray Granite Shimmer Ribbon – 6"


